

Table of contents

No headings in the article.
This blog cover how we can set up the code in google cloud and run the cypress test case
Pre-Condition
- User already logged in to Google Cloud
- User in google cloud Dashboard console.cloud.google.com/home/dashboard
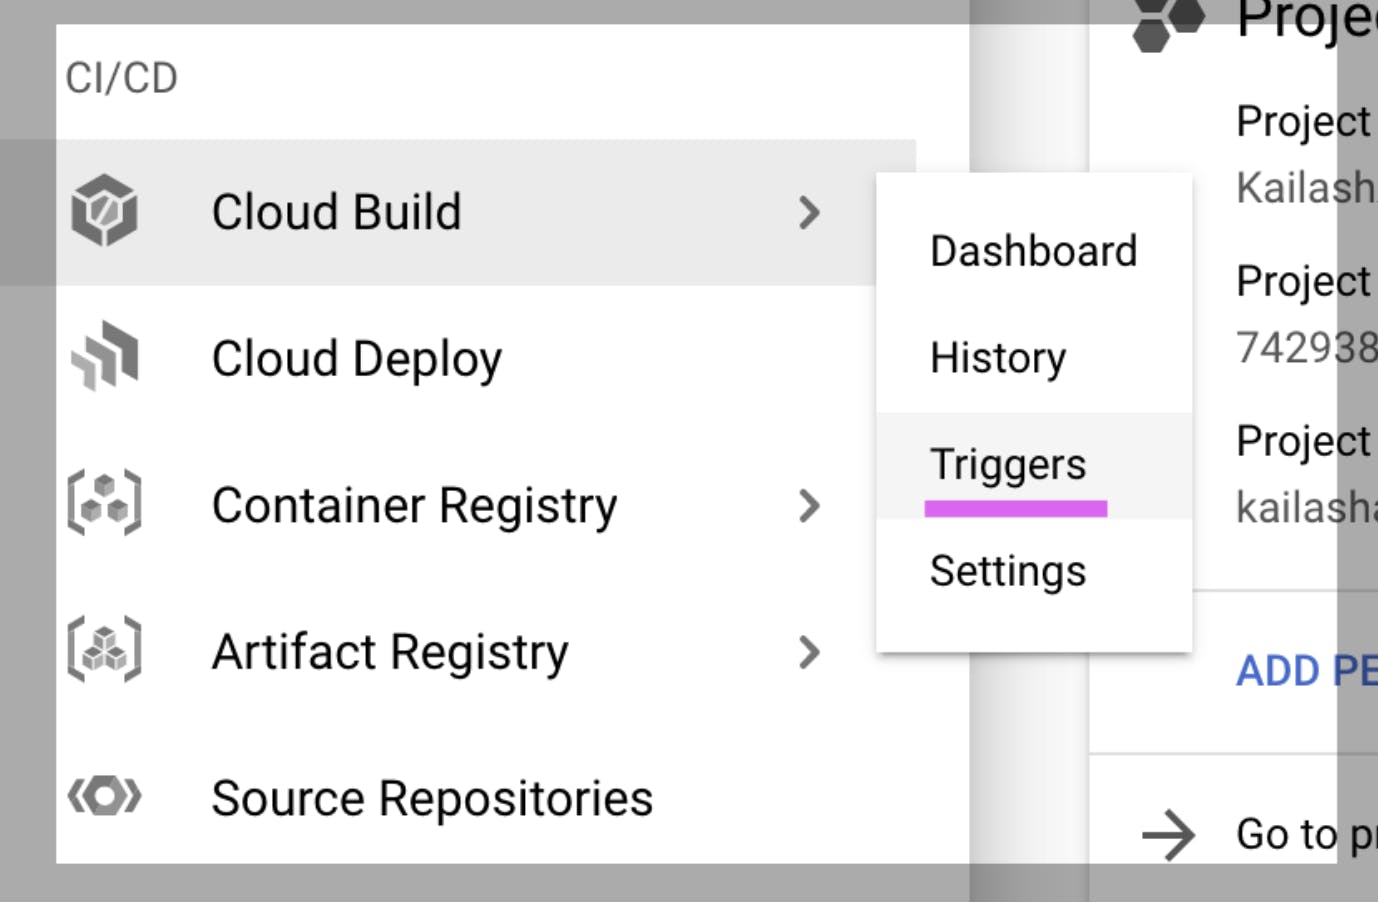
Steps to Set up the Code In Google Cloud *Step 1: In the Dashboard from the left side click on ‘Cloud Build” under CI/CD section
(cdn.hashnode.com/res/hashnode/image/upload/.. align="left") image.png
*Step 2 Click on Cloud Build -> Triggers
After clicking on the Triggers below screen is open
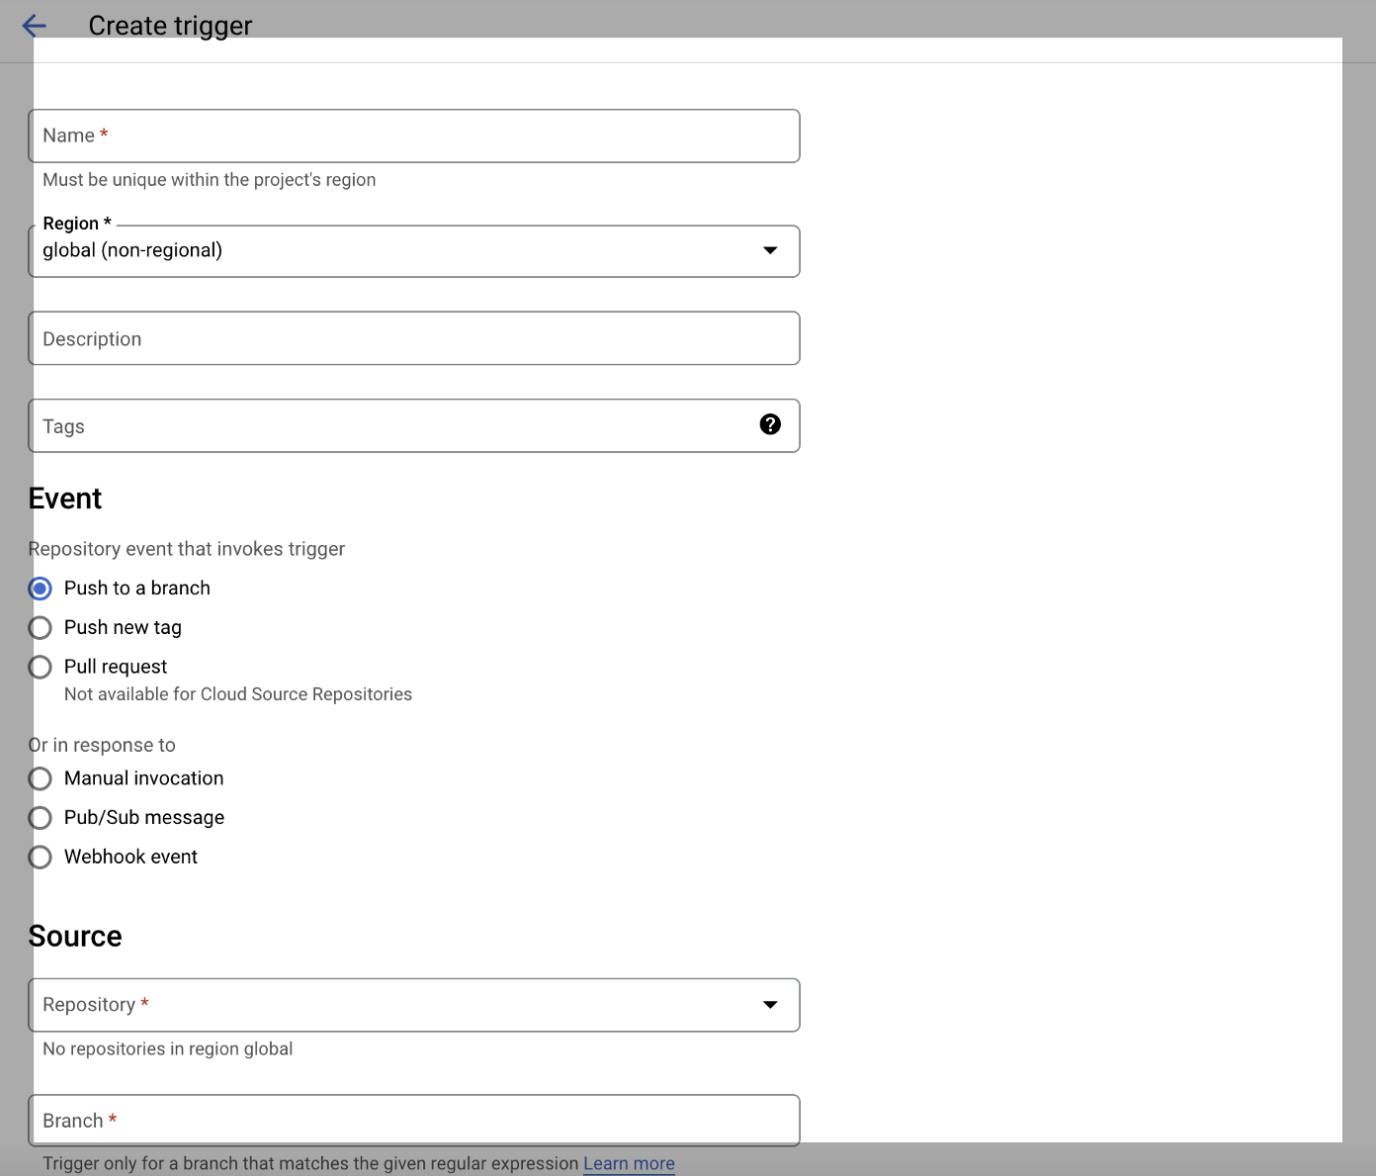
*Step 3 Enter Name, Select the Region
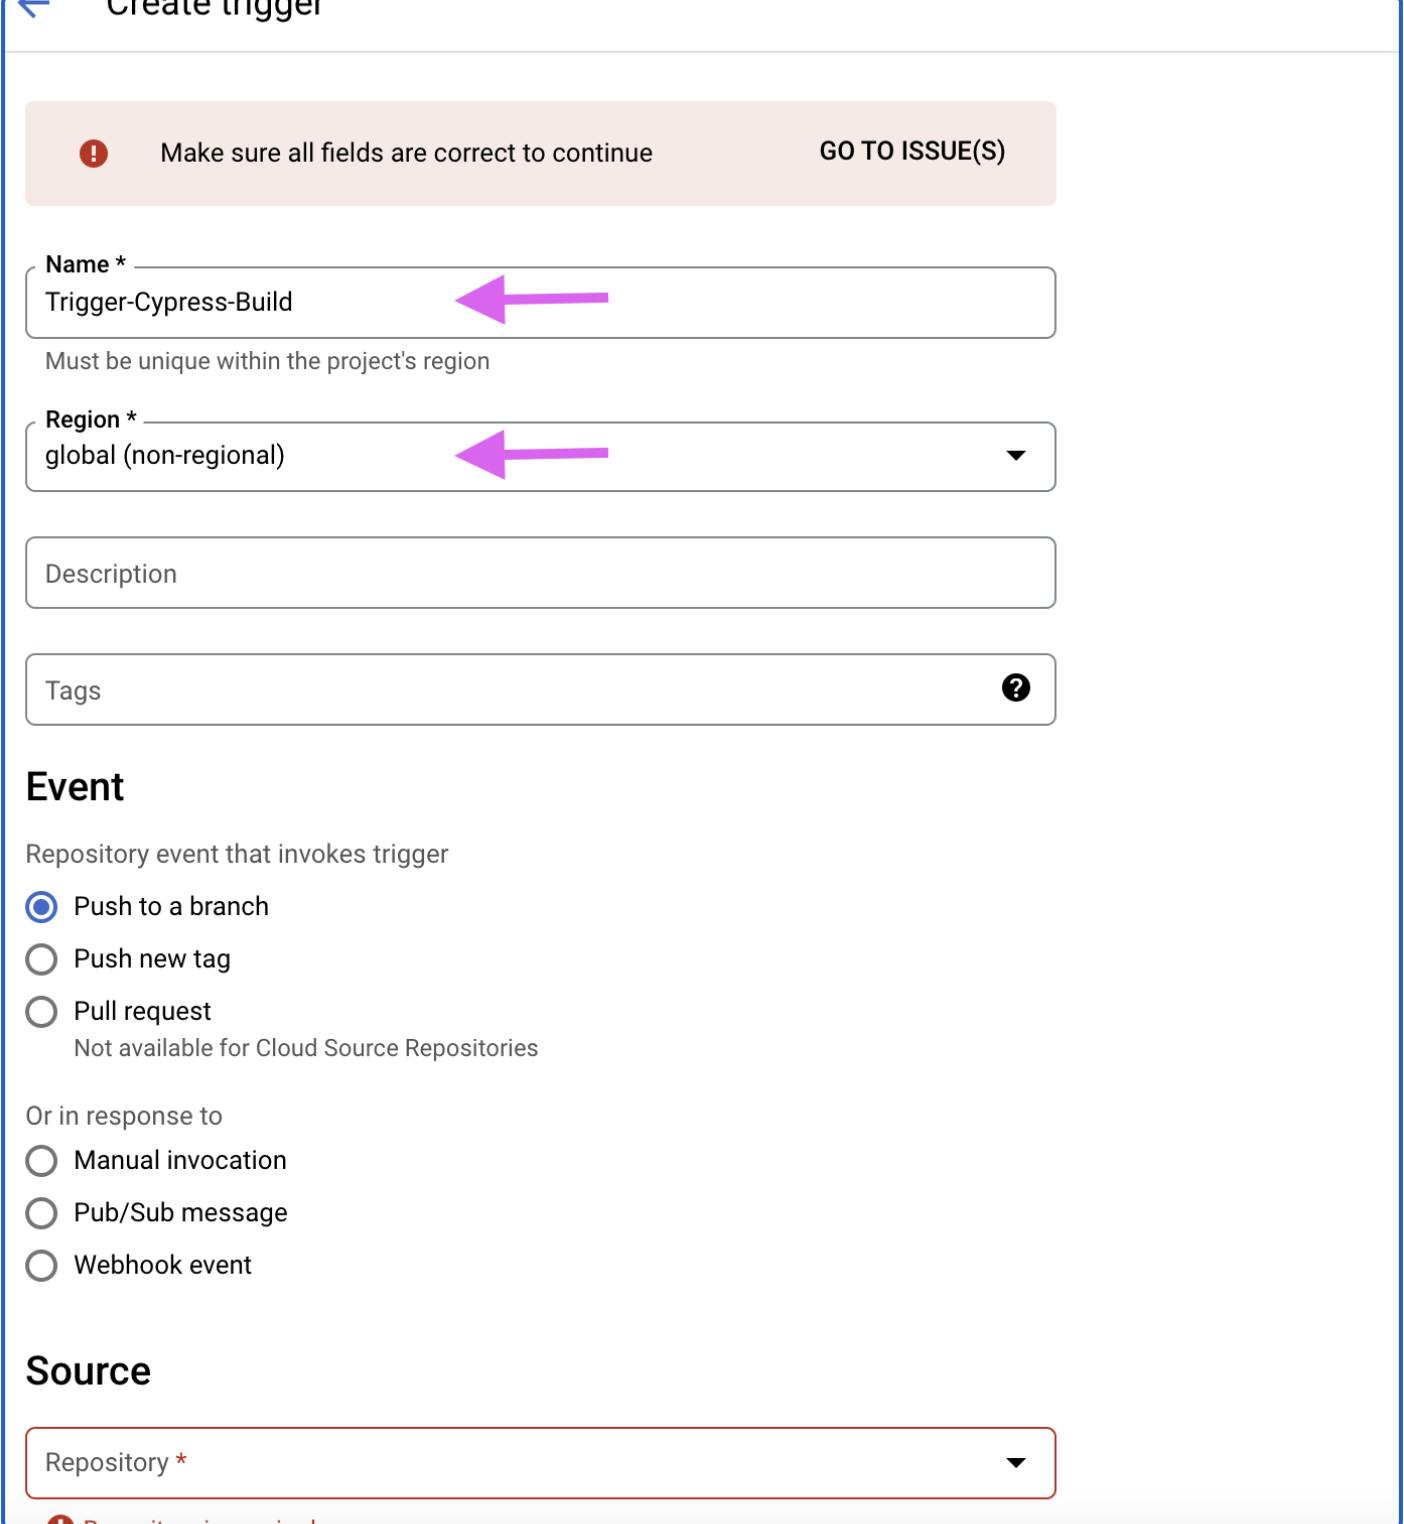
*Step 4 Select Source and Connect to the repository

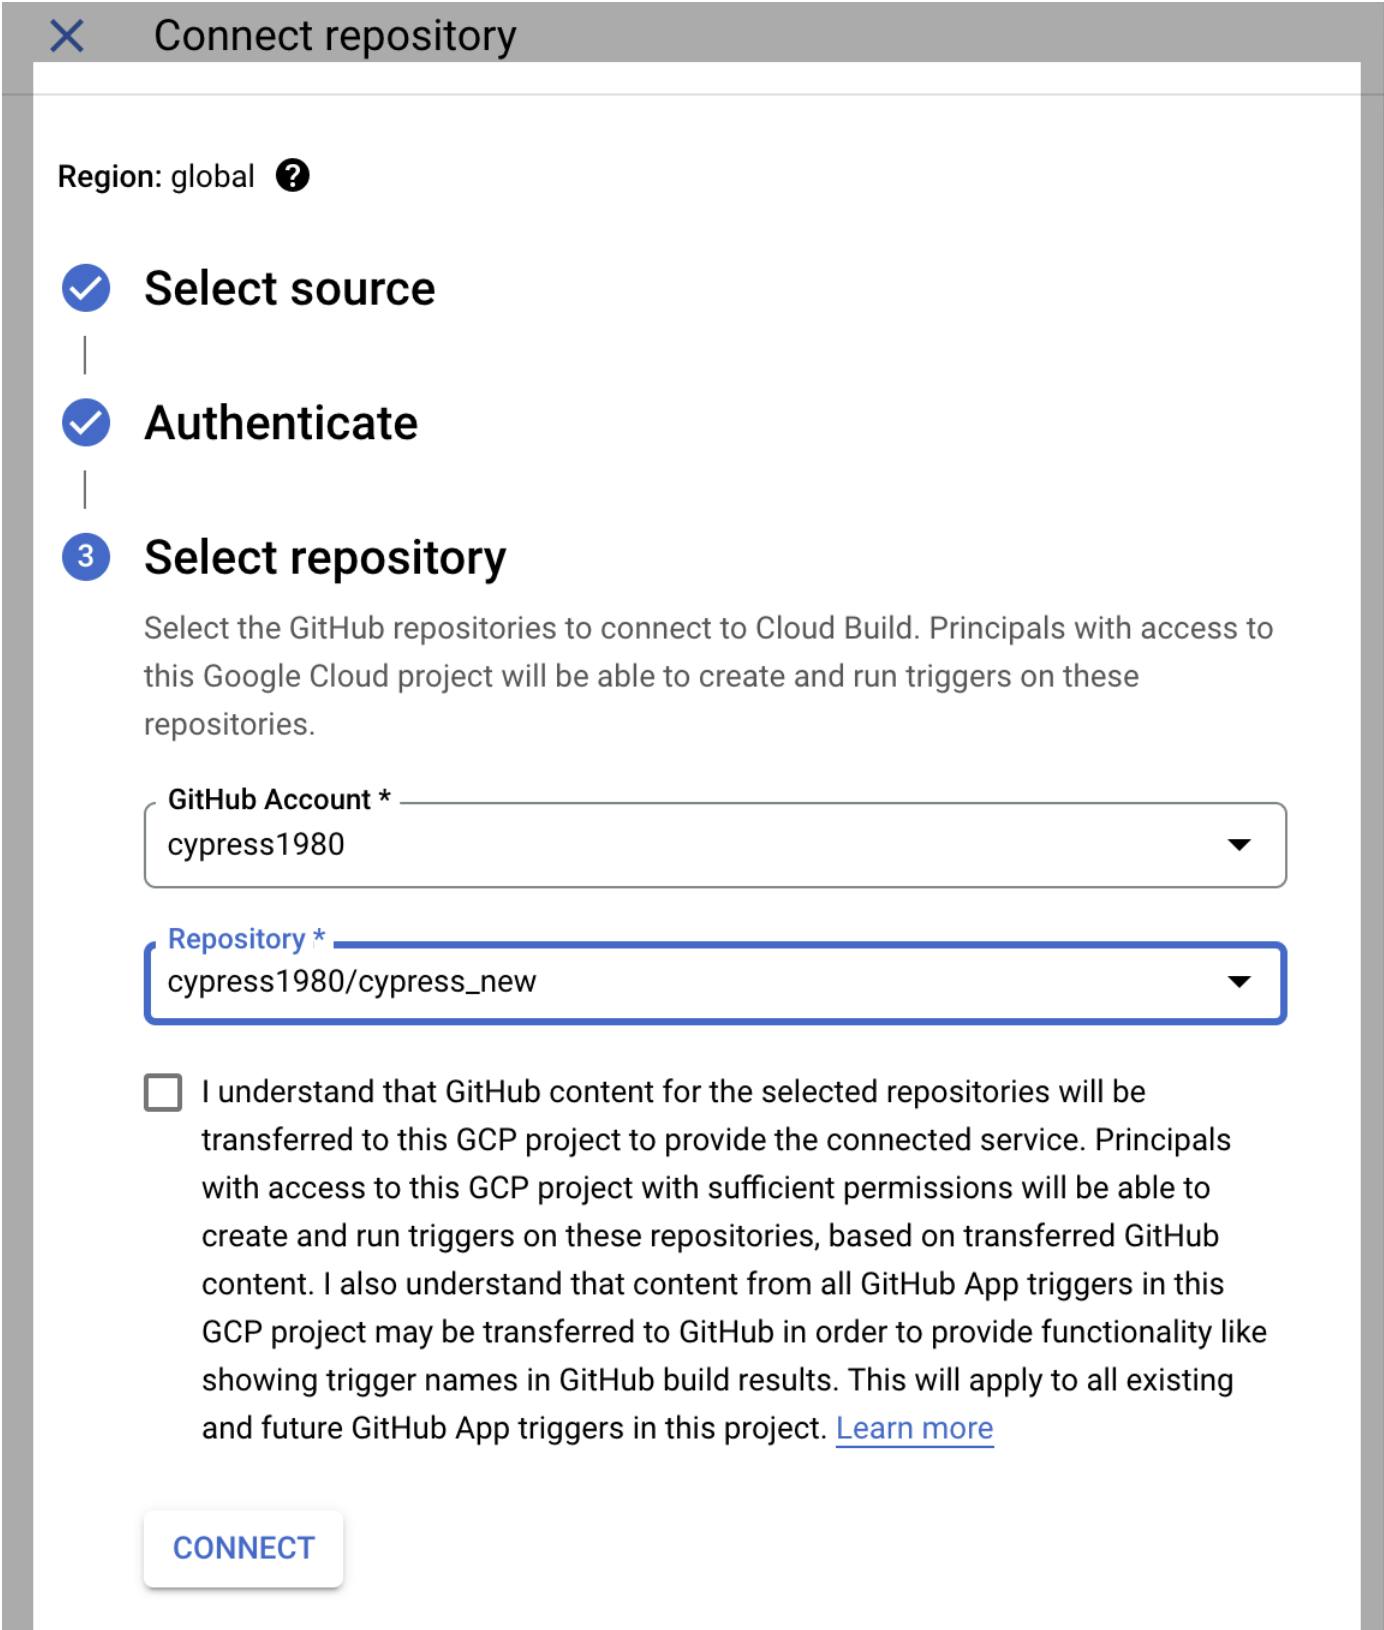
*Step 5 Select GitHub Account and Select repository
The project package.json file looks like the given below.
We will run test cases by giving cy:report (#line 11) in our .yaml file
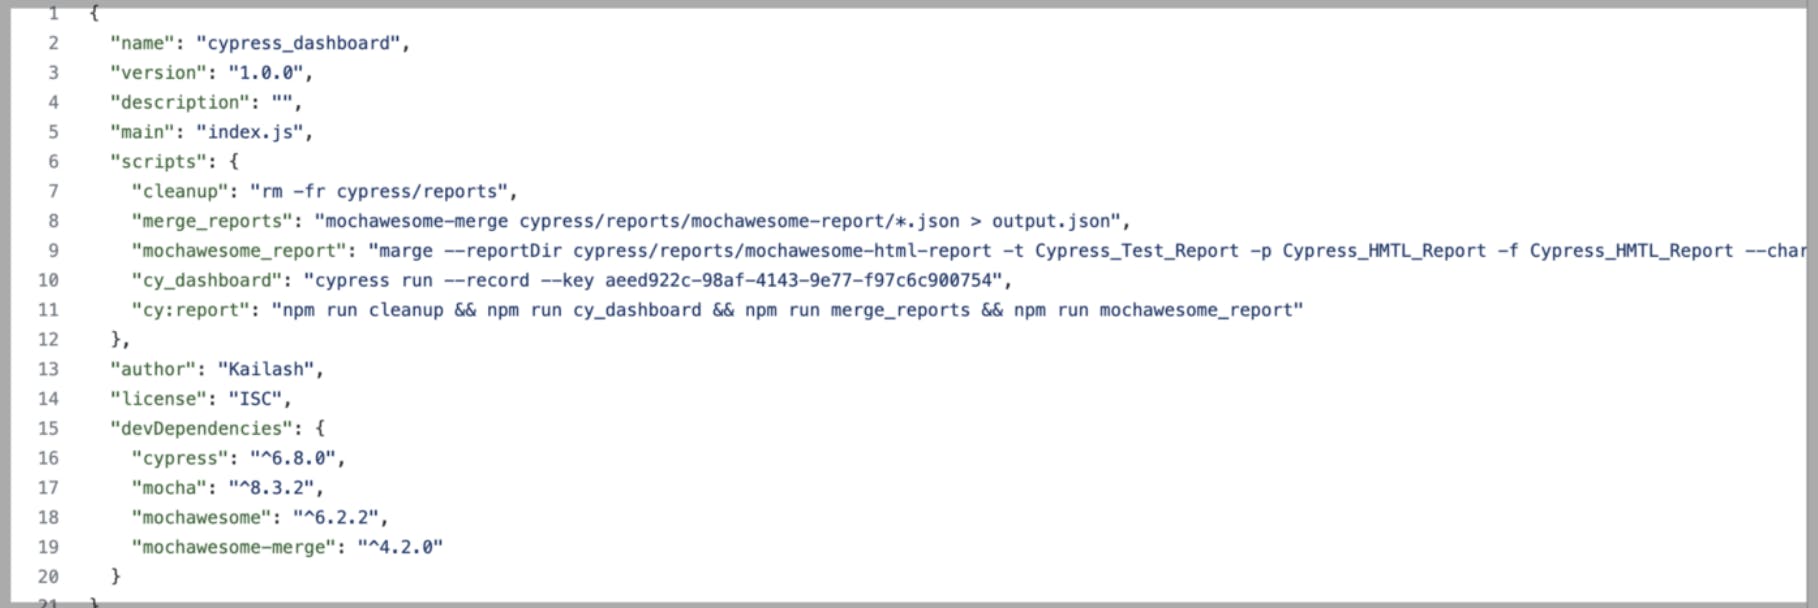
{ “name”: “cypress_dashboard”, “version”: “1.0.0”, “description”: “”, “main”: “index.js”, “scripts”: { “cleanup”: “rm -fr cypress/reports”, “merge_reports”: “mochawesome-merge cypress/reports/mochawesome-report/*.json > output.json”, “mochawesome_report”: “marge — reportDir cypress/reports/mochawesome-html-report -t Cypress_Test_Report -p Cypress_HMTL_Report -f Cypress_HMTL_Report — charts true output.json”, “cy_dashboard”: “cypress run — record — key aeed922c-98af-4143–9e77-f97c6c900754”, “cy:report”: “npm run cleanup && npm run cy_dashboard && npm run merge_reports && npm run mochawesome_report” }, “author”: “Kailash”, “license”: “ISC”, “devDependencies”: { “cypress”: “⁶.8.0”, “mocha”: “⁸.3.2”, “mochawesome”: “⁶.2.2”, “mochawesome-merge”: “⁴.2.0” } }
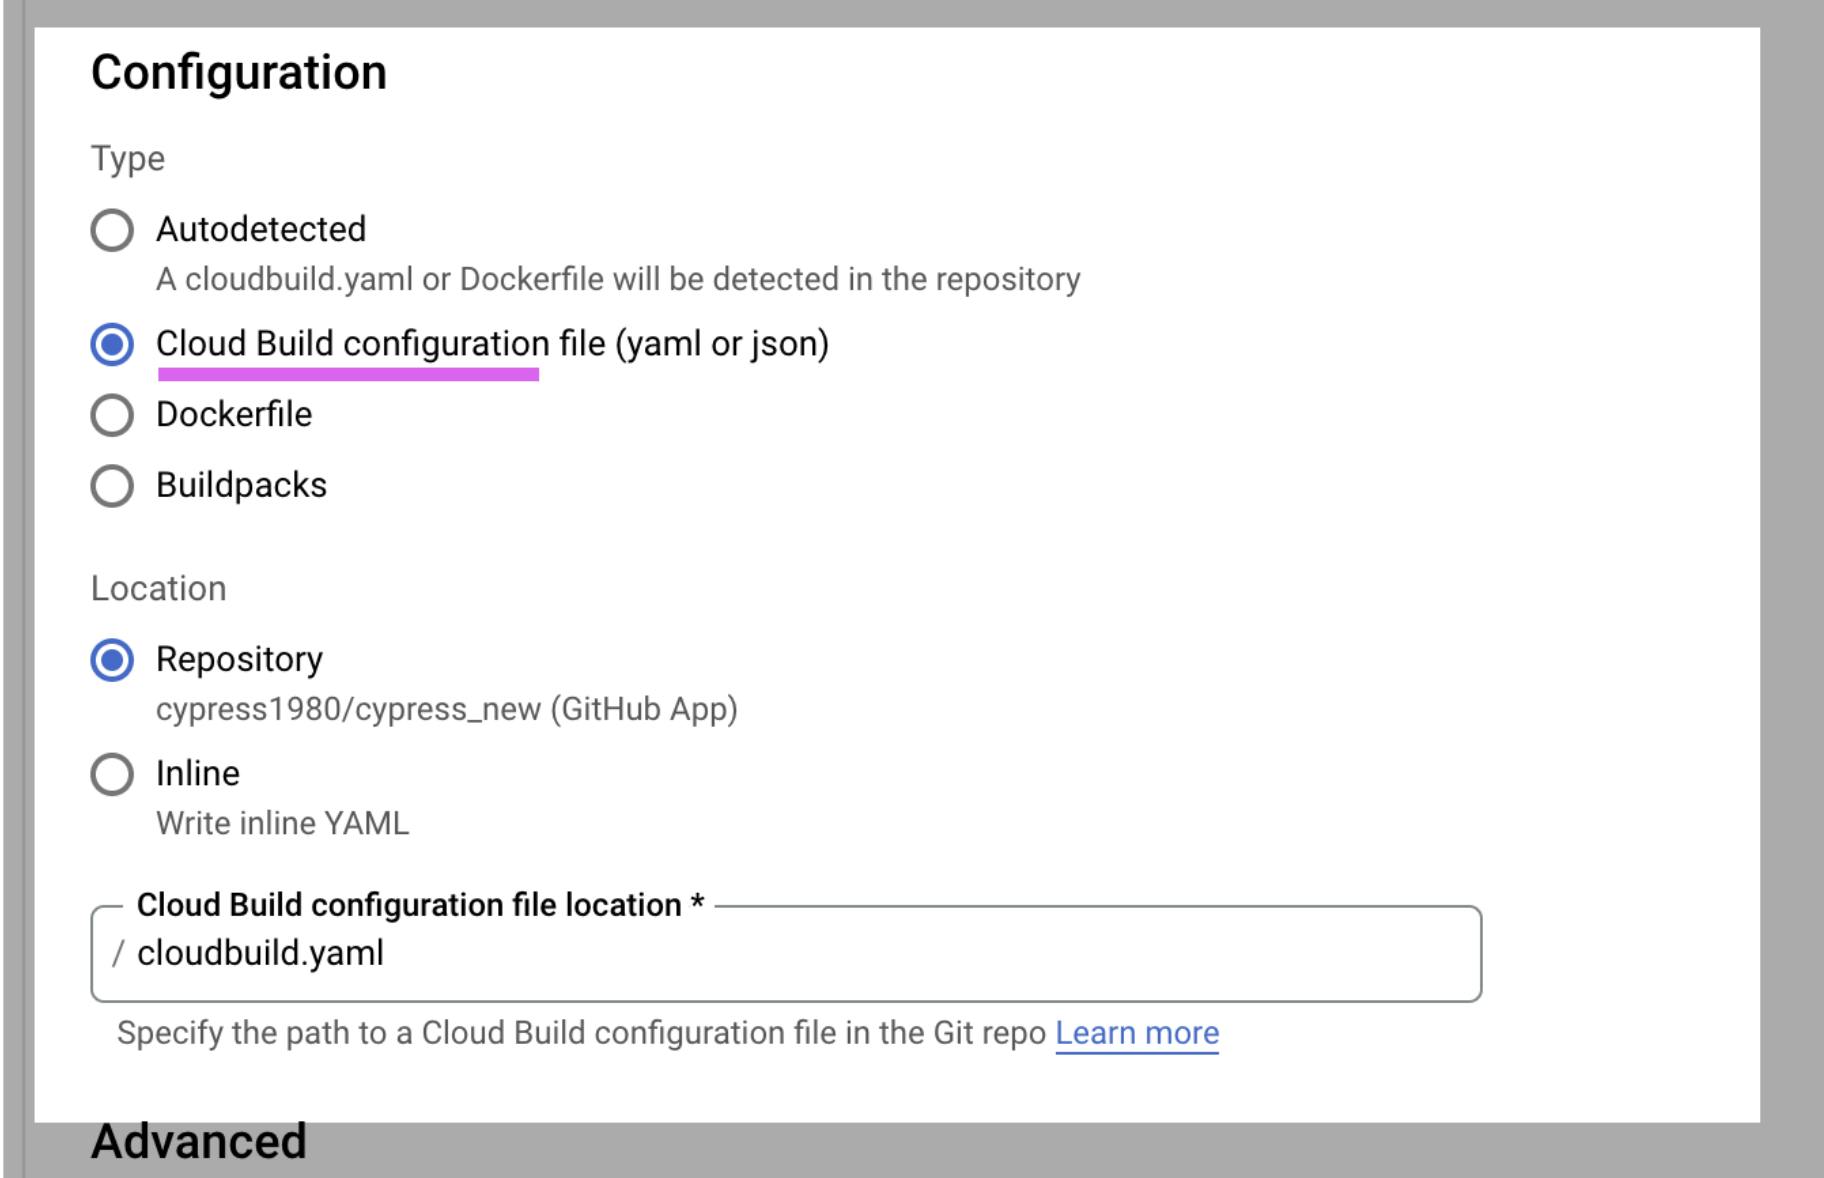
*Step 6 Under the Configuration select “Cloud Build configuration file (yaml or json)”
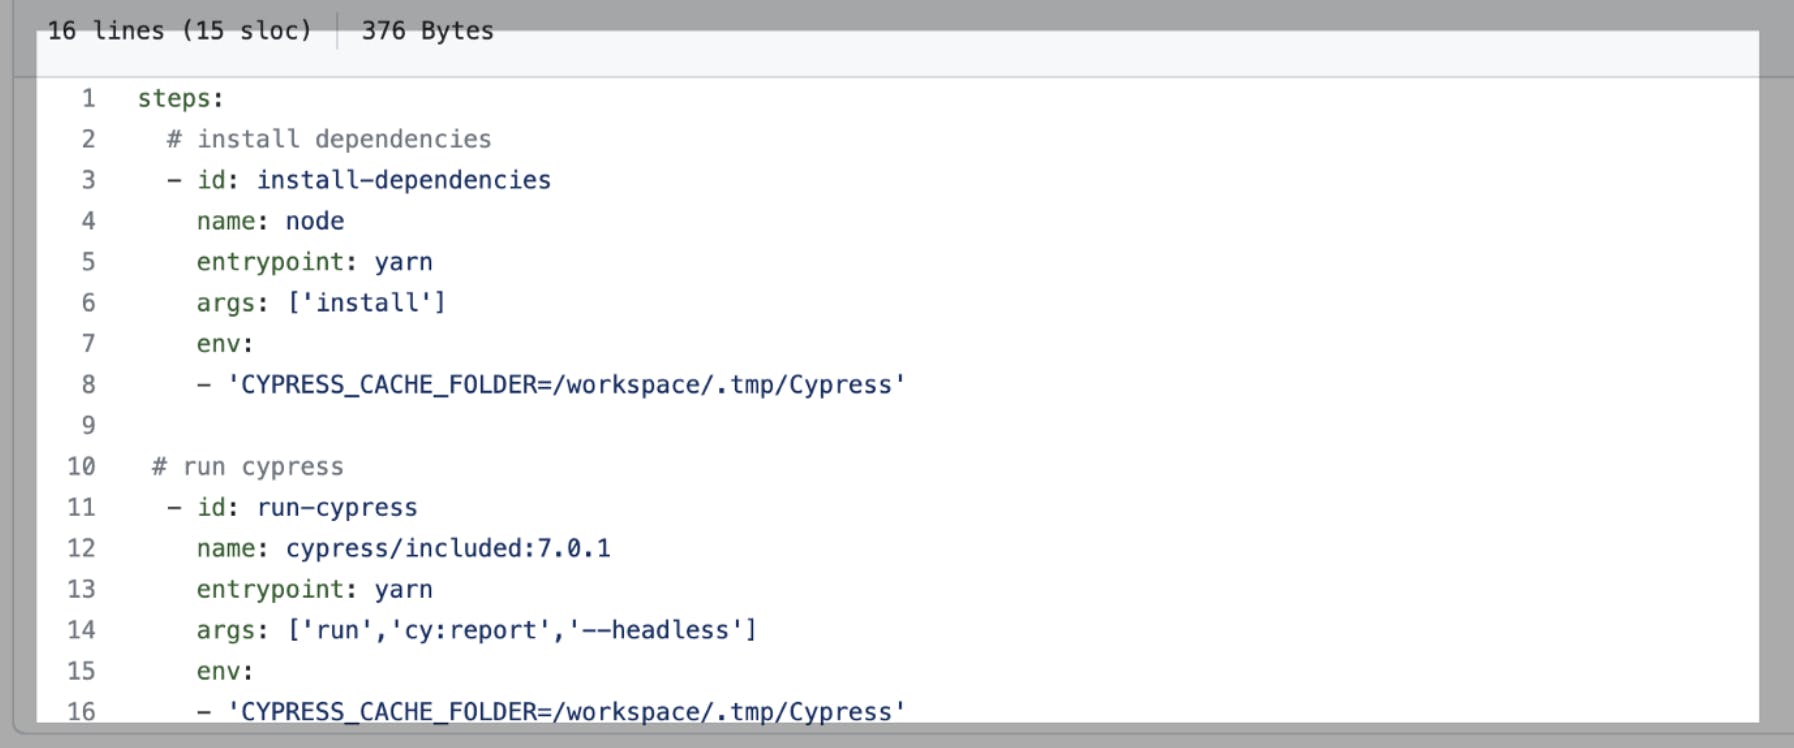
cloudbuild.yaml file looks like see below
In the below YAML we can see first we are installing dependencies then in Cypress image /include:7.0.1 we are running our test cases
Step 7 Click on the “Create” button below the screen open
Steps to Run the Test Cases
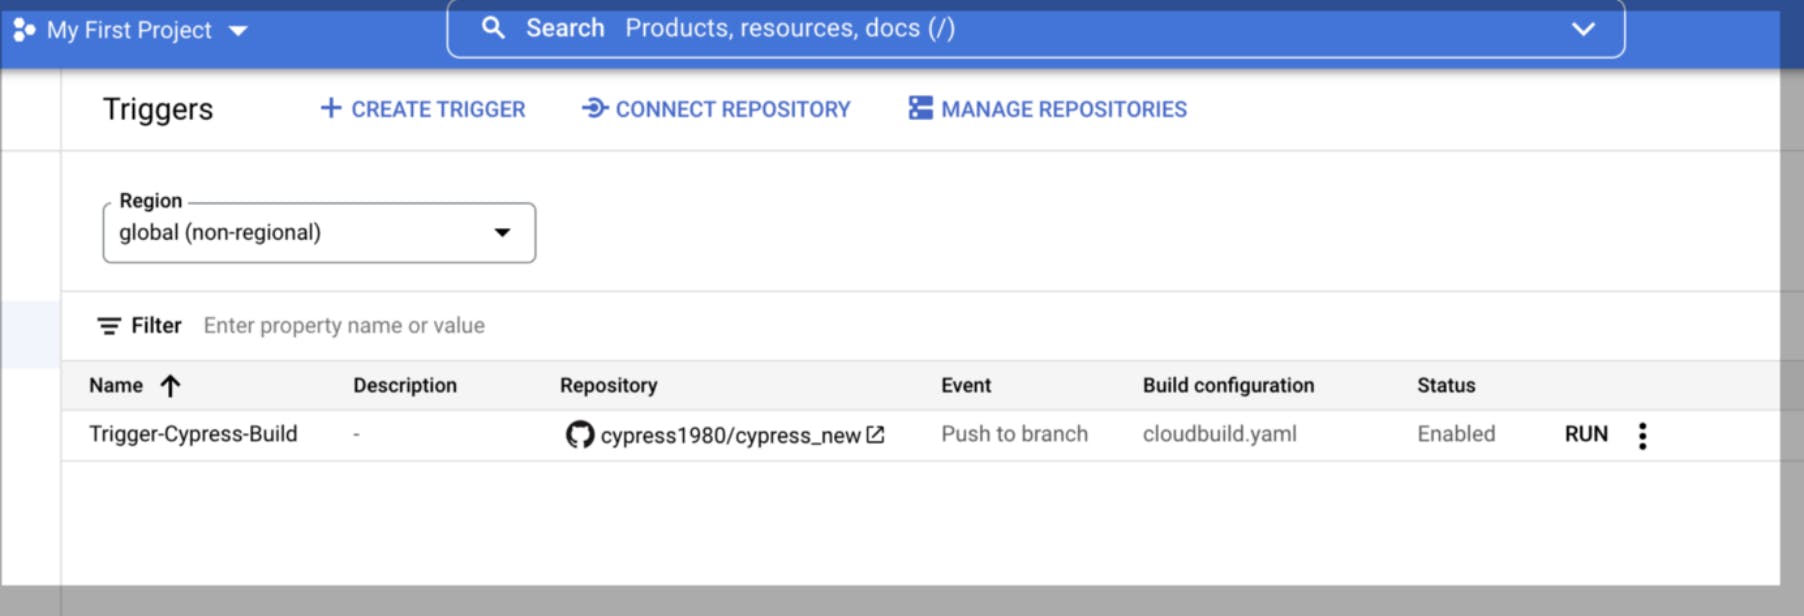
Step 1 Click on the RUN button from the above screen
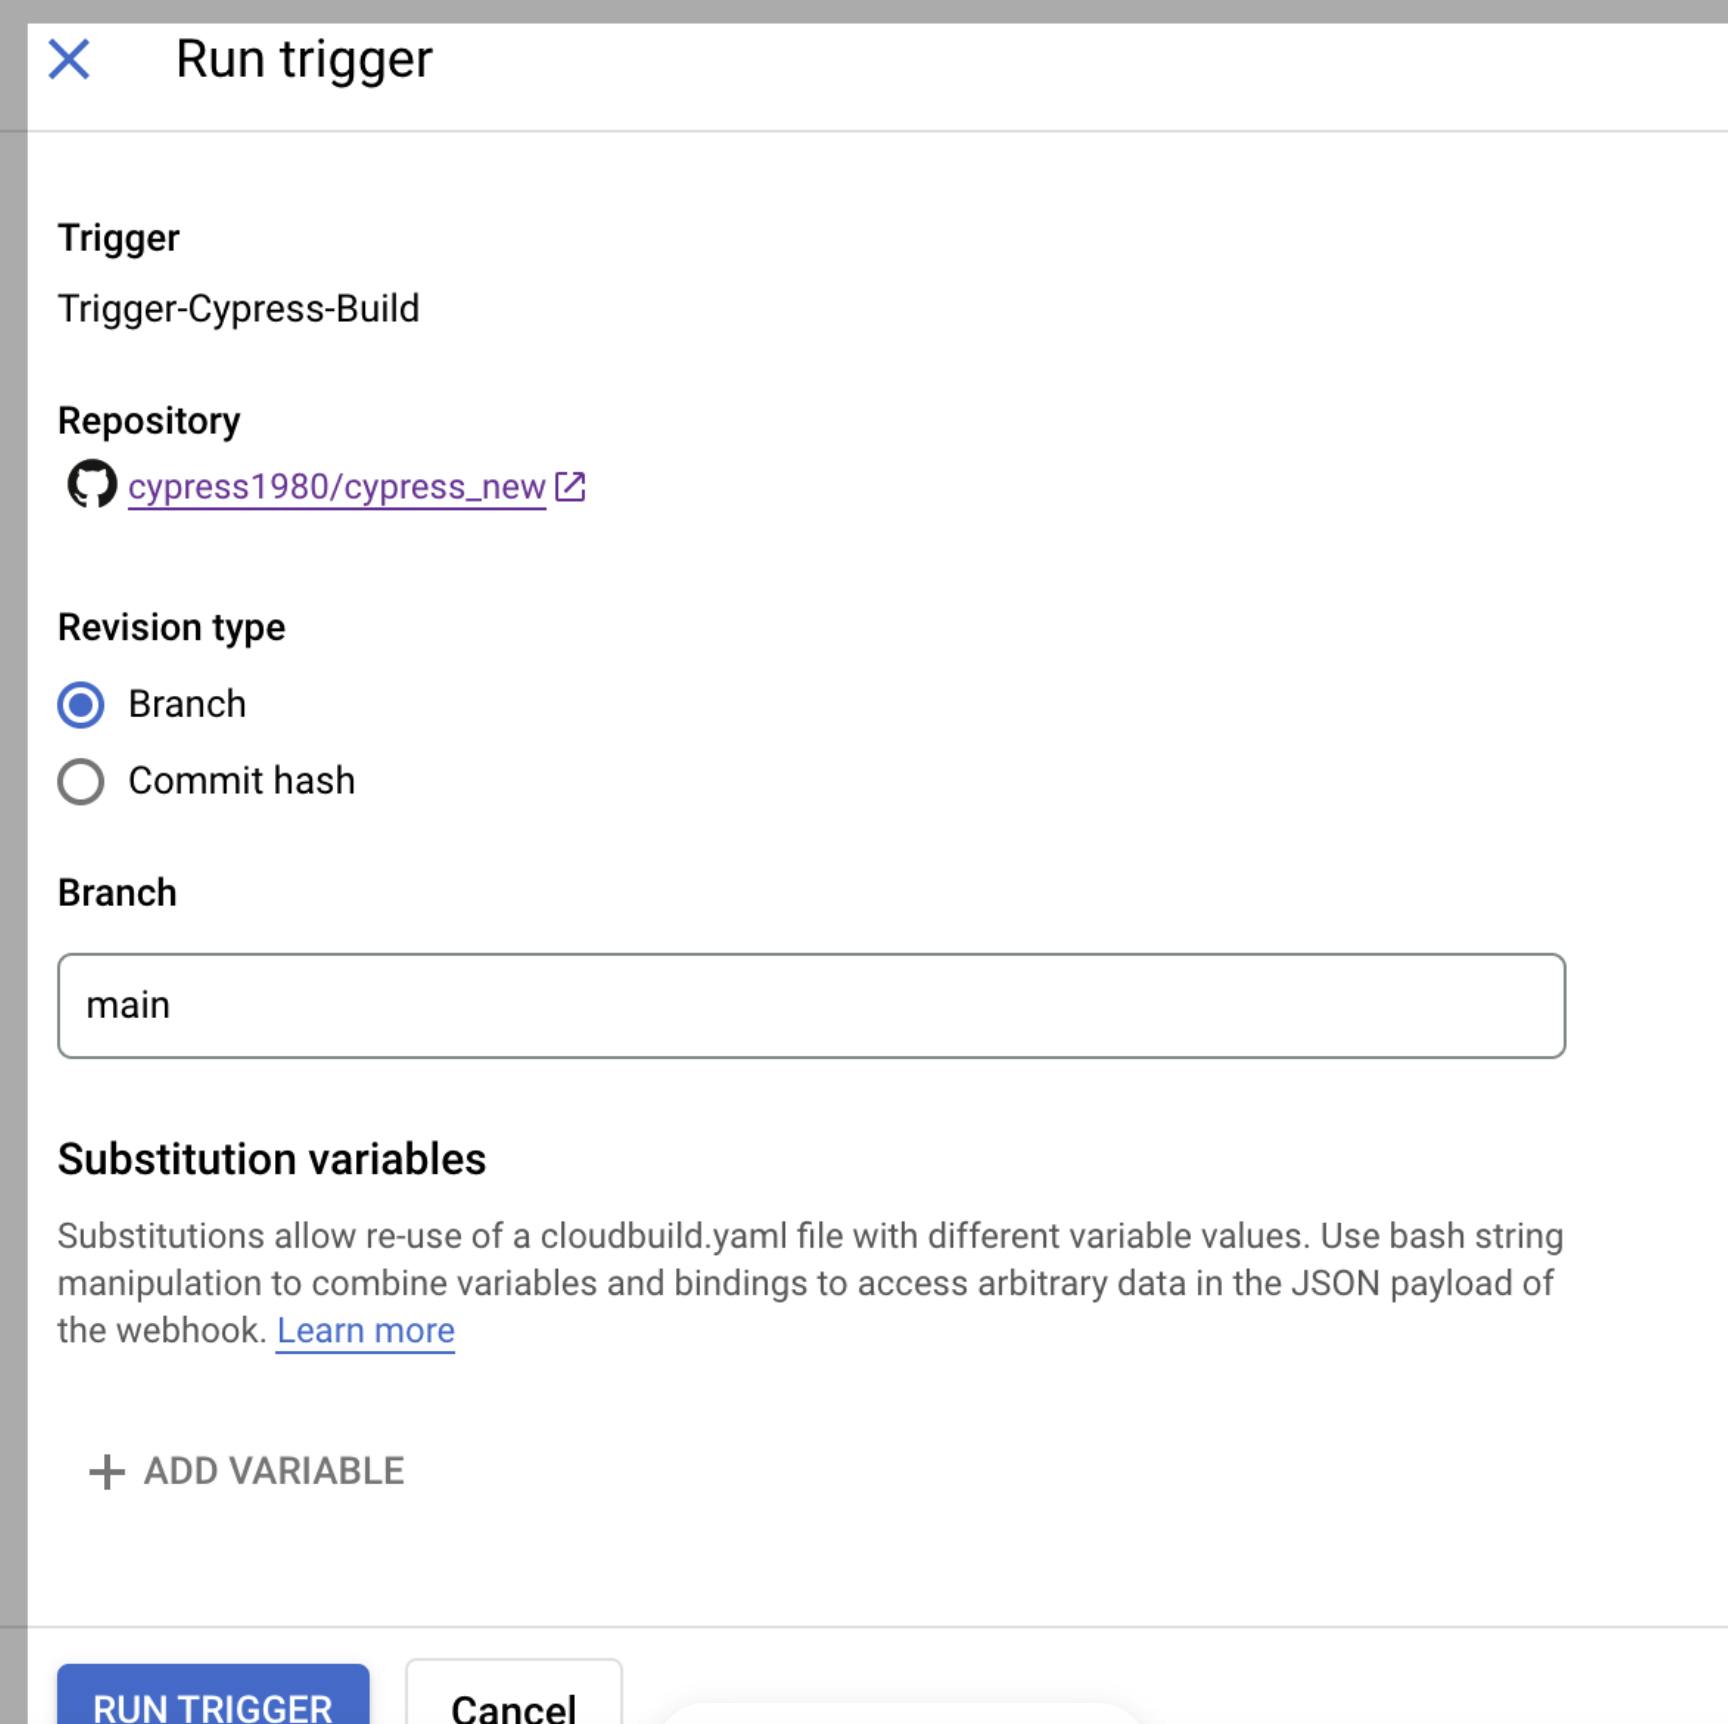
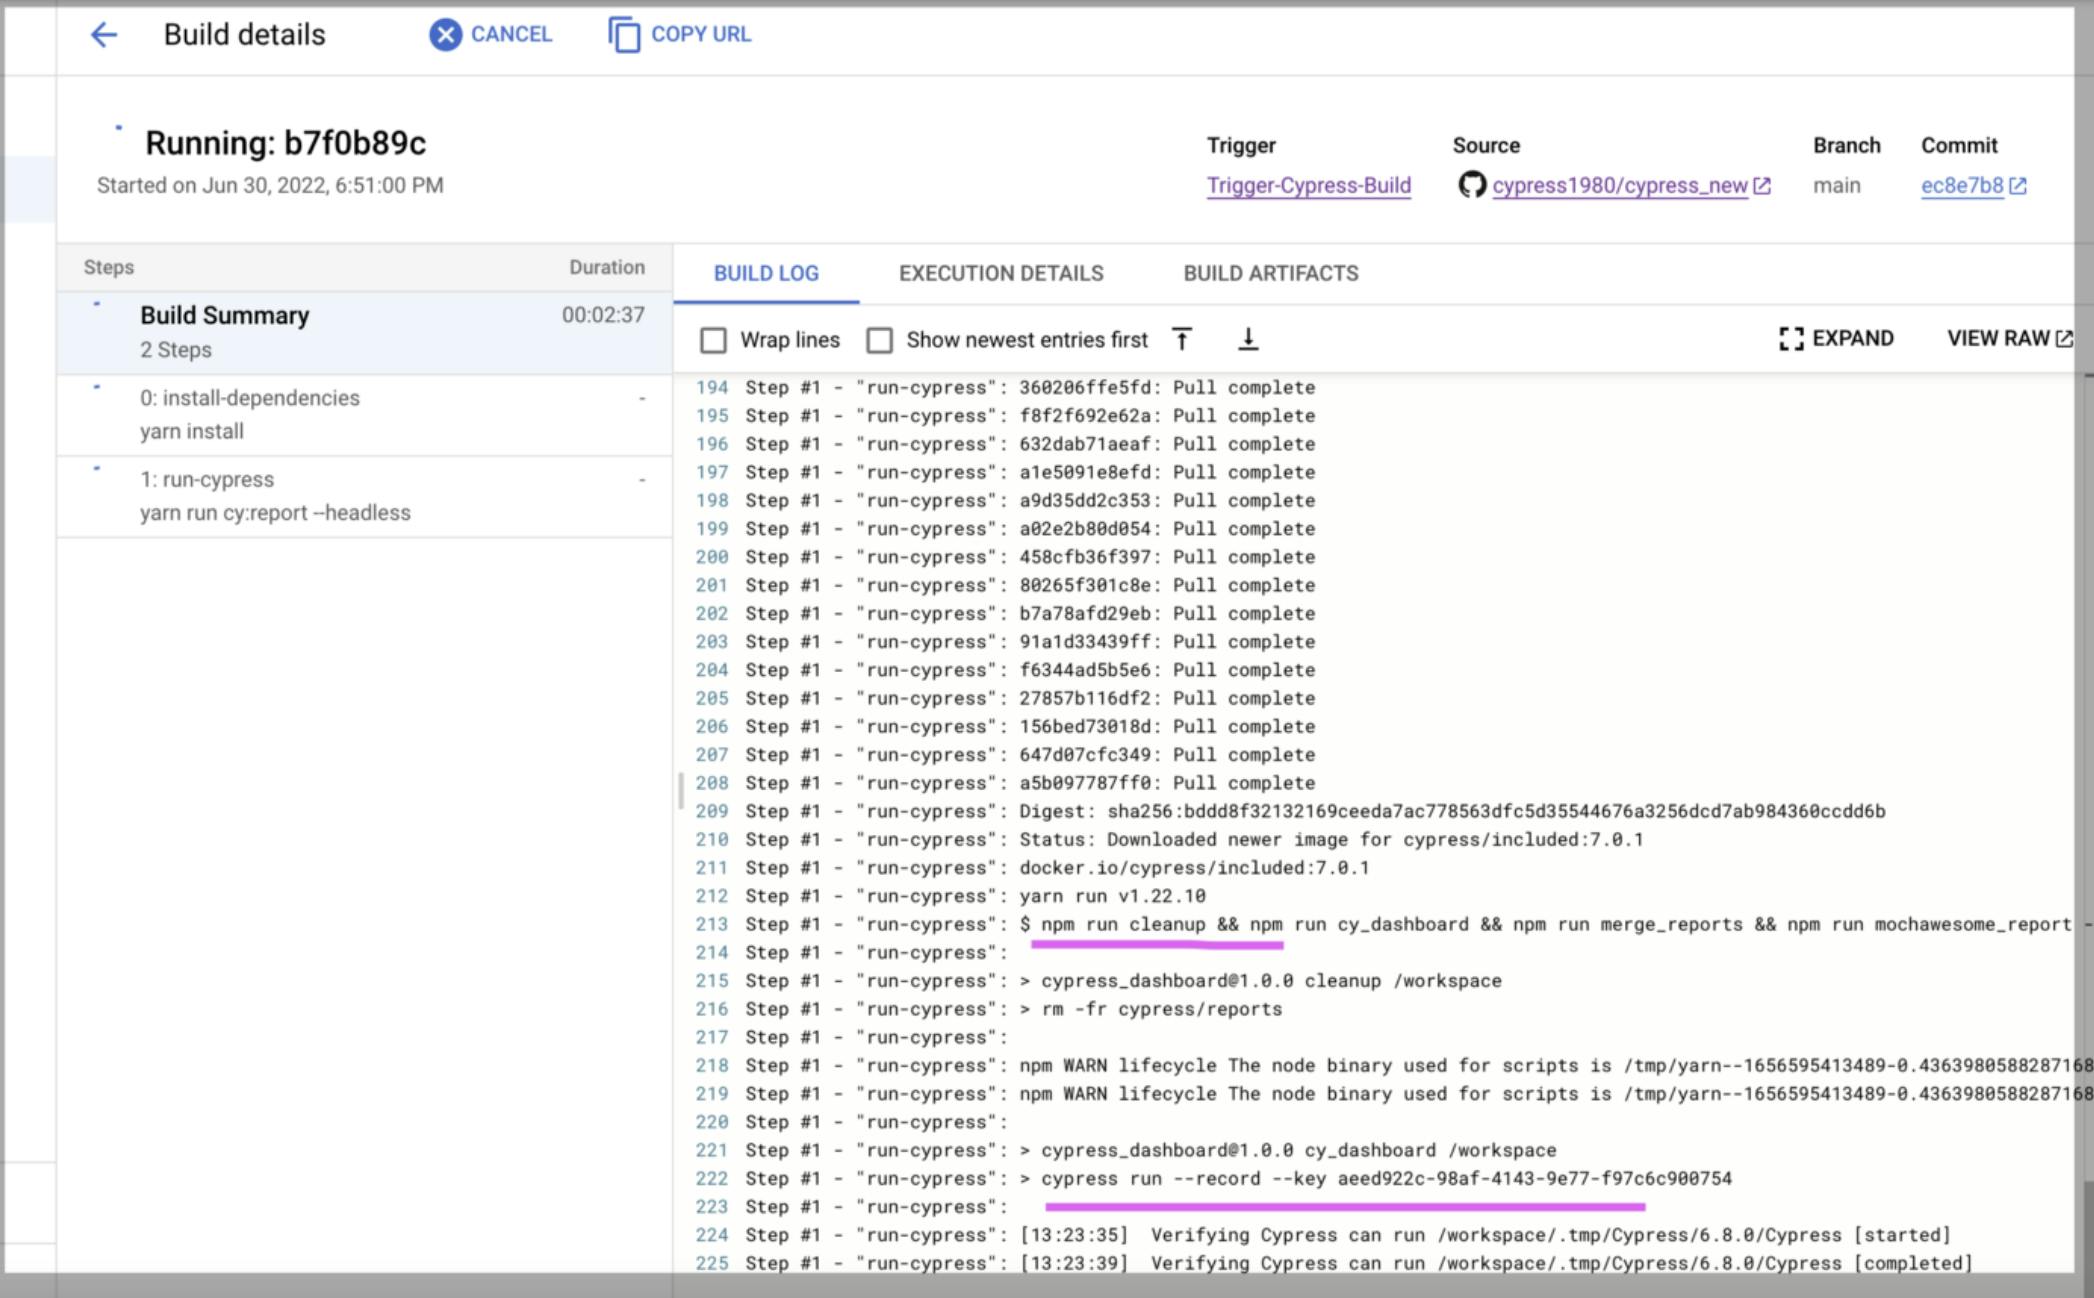
*Step 2 Click on the RUN TRIGGER button from the above screen. Build start running
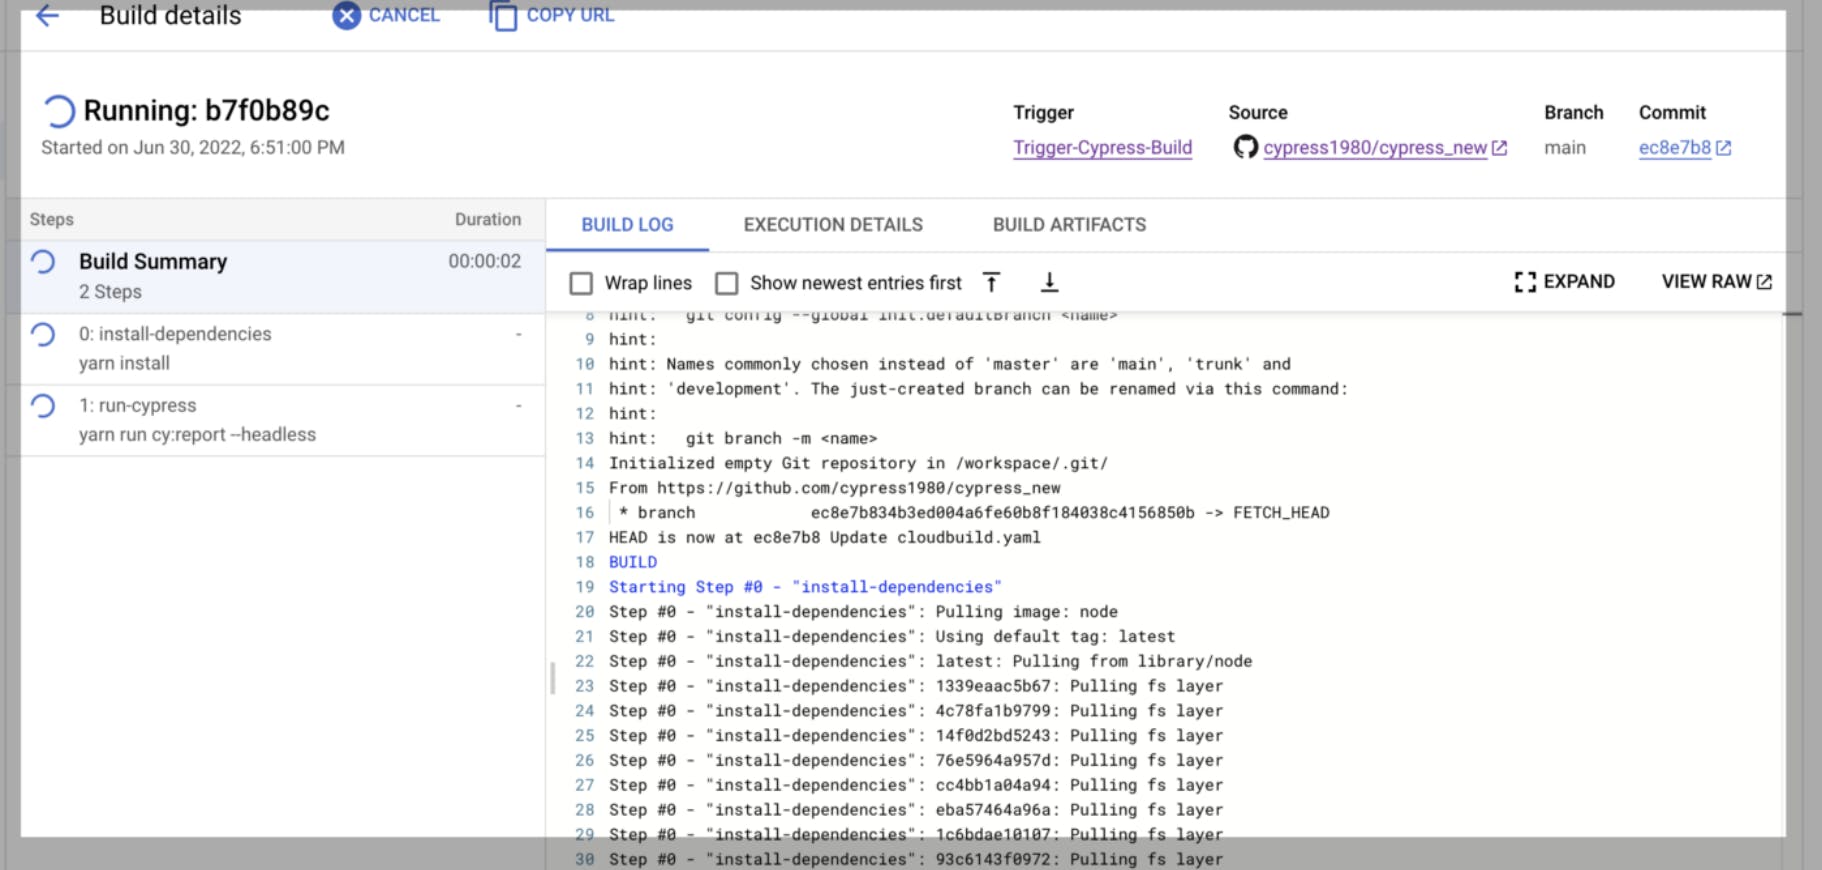
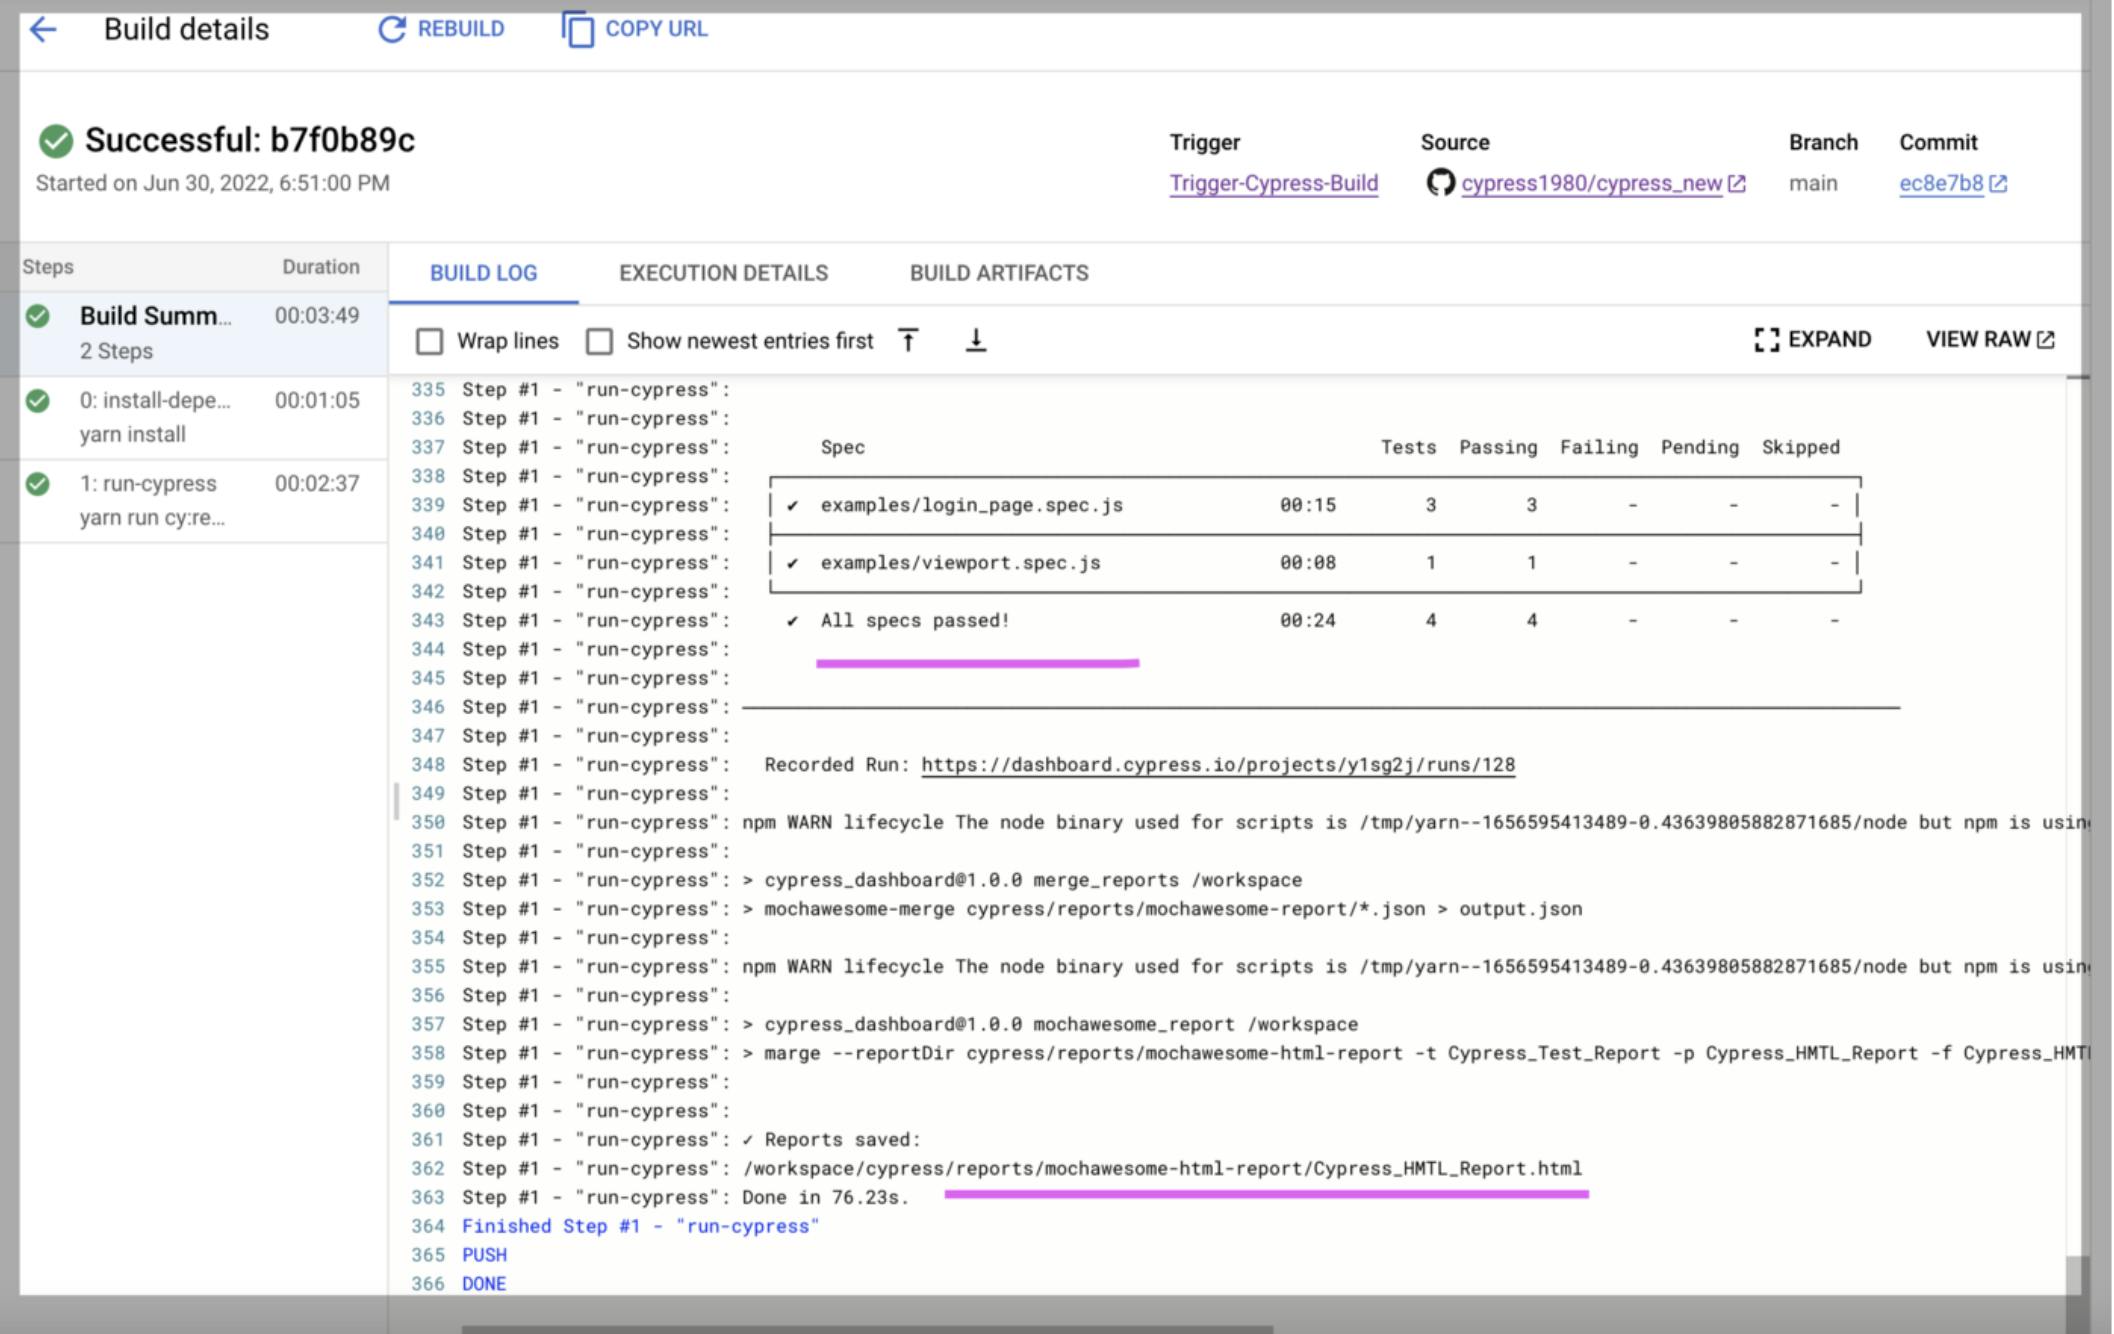
Test case start running see below screen